Author: clickgiant

Your Complete RV Maintenance Checklist

An RV parked at a camp site under a bright, starry sky at night.

The fun part of owning an RV is traveling with friends and family to explore new places and spend time away from the hustle and bustle of daily life. These are the experiences you have in mind when you purchase the RV, and you’ll create memories that will last a lifetime.

That said, it’s not all fun and games as an RV owner. You need to keep up with essential maintenance points to get the most out of your investment. Today, we want to use this article to present you with a detailed RV maintenance checklist to use as the months and years pass. With regular maintenance, you can make sure your rig is always ready for the next adventure you have in mind.

And while considering the critical topic of RV maintenance, it’s also worthwhile to consider how you store your RV while it is not in use. For that project, turn to American Carports, Inc. We offer durable and affordable metal RV carports to protect your RV from the elements. Try our Build & Price tool today to see what is possible, and feel free to contact us at your convenience to learn more!

The Value of Ongoing RV Maintenance

We want to start this article with a bit of motivation. When you understand how vital RV maintenance is, you’ll be far more likely to keep up with it over time. So, consider the points below as reasons not to fall behind on these tasks.

#1 It protects your money

No matter what type of RV you purchased, there was undoubtedly a significant price tag. Most RVs are well into the five-figure range, and plenty exceed six figures. Whatever the final sale price, you want to protect the money you put into your RV by keeping up with maintenance work. The more care you provide to your RV along the way, the longer you can expect it to serve you well.

#2 Avoid more significant repairs

Speaking of money, you can also protect your money by keeping your RV away from expensive repair work. Ongoing maintenance is one of the best ways to avoid more significant problems later.

#3 Enjoy your trips

When you are out on the road exploring new places, you don’t want to be dealing with maintenance and repair work. While some upkeep on the road is inevitable, keeping those chores to a minimum will be appreciated. If you stay ahead of the game on your maintenance tasks, you’ll be less likely to run into problems on your trips that need immediate attention. After all, the whole point of owning an RV is to have as much fun on your adventures as possible, and good maintenance practices set the stage for those enjoyable outings.

Between the money you can save and the enjoyment you can gain, staying motivated on RV maintenance tasks should be easy enough. In addition to having motivation, it’s also essential to be organized concerning RV upkeep so you know what you need to do and when you need to do it. Those two points will be the focus of the rest of this article.

Regular vs. Annual Maintenance

To get your mind around the many things that need to be done for your RV, it can help divide your maintenance tasks into two general categories. Most of the work you need to do (or have done) will fit neatly into one of these two groups, so this system works well for organizing your tasks.

The first maintenance category for your RV includes tasks that must be completed regularly. Regular maintenance includes ongoing tasks that must be done after every trip. These things will keep your RV in good condition and ensure it’s ready to use as soon as you are ready for another outing. Once you get into the habit of performing these duties, they’ll become second nature.

Our other category is tasks that only need to be performed periodically. Most of these items will fit nicely into an “annual” bucket. You’ll be in good shape if you do them once yearly, perhaps right before you store your RV for the off-season. There is no need to deal with these maintenance points after every trip, but you also can’t afford to forget about them entirely.

The Ongoing Maintenance Checklist

First, let’s review the list of ongoing maintenance points you’ll want to address after each trip you take.

Wash the RV

One of the core duties of an RV owner is to wash the RV regularly. Allowing dirt and grime to build up might not seem like a big deal, but it can cause significant issues in the long run. Washing your RV is far more than just cosmetic – regular washing will protect essential parts and help you to avoid problems and repairs later on.

Empty the kitchen

Leaving food items in the kitchen of your RV is a major no-no. Empty everything after each trip and take a moment to wipe down the surfaces and dump out the trash can. Leaving food items behind invites little critters to explore your rig.

Check your tires

You won’t need to do active maintenance on your tires after each trip, but you want to check their condition and confirm that plenty of tread is left and the air pressure is appropriate. Maintaining a steady tire pressure will help you get better gas mileage and will help to keep you safe on the road.

Flush the tanks

Regularly flush the tanks after your trips to avoid lingering odors that make your RV far less enjoyable to use. You can also use sanitation products in your tanks to clean them thoroughly and ensure they are in good condition and working correctly. A problem with one of your tanks can quickly turn an enjoyable trip into a major headache, so this is one of the critical points to monitor.

Shut the windows and doors

When the work above is complete, ensure everything is closed up and appropriately locked while the RV isn’t in use. Even if it’s only going to be a week or so before your next trip, closing things up will make it less likely that an unwelcome visitor will explore the inside of the RV.

Depending on the specific type of RV you own, and the age of that RV, you might find that you need to add to this maintenance checklist. However, it’s a good starting point, so use these points to get into the habit of caring for your RV and expand the list as you see fit to keep your rig in tip-top condition.

Annual RV Maintenance

Generally speaking, on your annual RV maintenance checklist, you want to monitor for your RV relate to more extensive systems that wear down gradually over time. These things should last for a while, but when they start to break down, they can be expensive to fix or replace. Going ahead with consistent maintenance on an annual basis on the points below will go a long way toward making your ownership experience a good one.

A detailed inspection

If you have stayed busy throughout the summer months going on various RV adventures, you might not have had much spare time to pay attention to the condition of your rig. However, the end of the season is an excellent opportunity to inspect everything on board carefully. This includes looking at the roof to check for damage, checking the seals for any cracking or peeling, etc. When you spot anything that looks like it could turn into a problem, determine if you can fix it yourself or if you’ll need professional help.

Add lubrication

The nature of RV design means there are many moving parts on board. On an annual basis, make it a point to lube any moving components that might have dried out over the year. Always refer to your owner’s manual to ensure the right lubrication type is used for this task.

Test various systems

You might find that you go on many trips without using certain RV parts. For example, if you’ve been camping primarily in warm weather, you might not have had any reason to turn on the heater. So, your annual maintenance period is a good time to turn on that heater and ensure it works correctly. In addition, any needed maintenance can be done at this time so you are sure the system is ready to go when the next travel season rolls around.

American Carports Has Your RV Covered

We hope you enjoyed this RV maintenance checklist! Performing maintenance on your RV might not be your favorite activity, but it will undoubtedly pay off in the long run. And, once you get into the habit of keeping up with specific maintenance tasks, you might find that they are pretty easy to complete – and you may even come to enjoy the process.

And remember, your maintenance life will be made easier by parking your RV under a roof when it is not in use. Explore our free Build & Price tool today to see what is possible, and feel free to contact us if you have any questions along the way. Again, thanks for visiting our blog, and we hope to serve you soon!

7 of the Best Camper Storage Ideas

Man and woman shopping together for plastic bins, one of the many creative storage solutions for campers!

Even the largest RVs come with limited storage space on board. As you start loading up the rig with clothes, cooking gear, food, recreational equipment, and more, that space will disappear quickly. So, it’s always important to save space where you can, making the most of every last square inch. Of course, you’ll get better at the skill of packing your RV strategically as you gain experience, but we’d like to help by offering some creative tips below. Read on to discover seven of the best camper storage ideas!

#1 Utilize Bins

Keeping your things in plastic bins or totes is one of the best ways to tame the packing beast. When you use containers, you can easily stack things that otherwise wouldn’t work well for stacking. Also, you can purchase containers of various sizes to fit every little nook and cranny you have available in your RV. Consider looking for bins with locking lids so you don’t have to worry about the tops popping off in transit. Also, clear containers make it easier to find what you are looking for quickly, so that’s another appealing feature.

#2 Store in the Shower

While shower storage might seem odd at first, it makes a lot of sense when you think about it. Unlike the shower in your home, you probably don’t use the shower in your RV all that often, and when you do use it, you are just rinsing off quickly. So why not put some things in there for storage that can easily be pulled out of the way? A few of the bins we mentioned above would be perfect candidates for storage in the shower space.

#3 Collapsible Trash Container

You certainly need a place to put your trash in the RV, but a regular trashcan may take up more space than you have to spare. Try using a collapsible container instead that you can set up while you are on your trip but can quickly be emptied and folded away when in transit from one place to another.

#4 Look for Shoe Solutions

You might find that you want to take a variety of types of shoes with you on RV trips, especially if you are exploring the outdoors. Many shoe storage options on the market are designed specifically for RVs, including hangers with slots for several pairs. These products are typically cheap and can be found on Amazon.

#5 Sticky Hooks

Add hanging hooks to your RV that stick onto the wall and can be pulled down anytime without leaving residue behind. These are a great way to hang towels in your bath or kitchen area or create a spot to leave the keys. Since these hooks are so affordable and easy to install, you might find yourself coming up with countless ways to use them.

#6 Keep Your Food Gathered

Earlier, we discussed using plastic bins for your various items, but you can also take the same approach for the food that goes with you on each trip. First, buy some shallow plastic containers that don’t need lids that will fit nicely in the pantry area of your RV. Then, each time you get ready for a trip, fill up those containers with the foods you want to take, and everything will be organized and under control when you arrive at your destination.

#7 Bring Fewer Things

Okay – so this last one isn’t a trick to get more out of your storage space, but rather a reminder that you probably don’t need to bring everything you planned on packing. Things will often go unused during a trip, so pay attention to the items that never seem to get used as the trips add up. Once you notice that certain things are never needed, leave them behind on future trips and open up some space for easier packing or other items you might enjoy.

The Perfect Home for Your RV

We hope the seven camper storage ideas above have motivated you to work on properly packing up your camper for your next trip! Once you implement some of these tips, along with your own unique solutions, you’ll be amazed at how much can fit on an RV without making it feel crowded or cluttered.

And, when your RV isn’t out on the road exploring new places, make sure it remains in good condition at home by parking it under a structure from American Carports, Inc. Explore our Build & Price tool to experiment with different features and configurations. And always, you are welcome to contact us at any time if you have any questions along the way! Thank you for visiting our blog, and we hope to help you soon!

Is It a Good Idea to Cover Your RV?

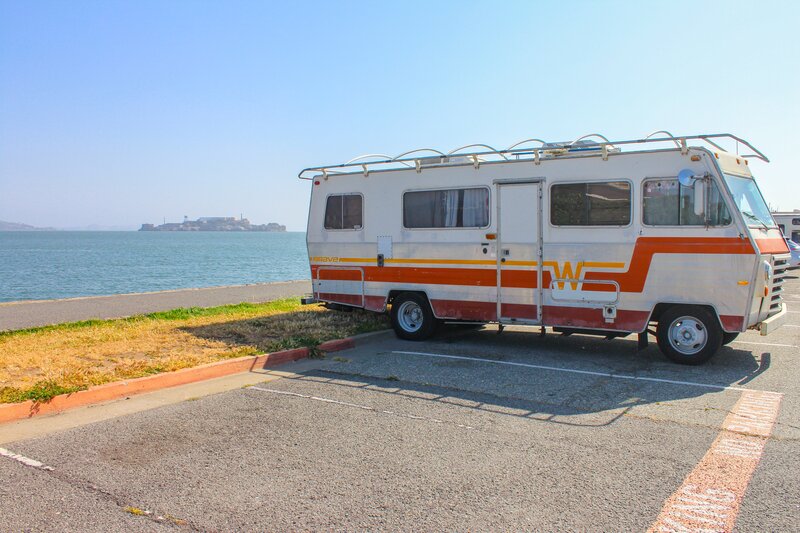
An RV camper parked outside near the ocean

Purchasing an RV is a significant investment. Depending on what size and type of RV you buy, it’s easy to spend in excess of six figures on your new rig. Of course, you get a lot for your money regarding experiences and enjoyment, but there is no downplaying the high costs of owning an RV.

Given those costs, it’s essential to protect an RV as much as possible, both while it is in use and storage. When in storage, you can cover the RV to keep it protected from the elements. But is it really a good idea to cover your RV? Let’s dive into that question in the article below.

The Short Answer: Yes

To cut right to the chase, it’s a good idea to cover your RV whenever possible. Even if you live in a relatively mild climate, the damage that local weather conditions can do to your RV will be significant. You may discover that you need to look into repairs sooner rather than later just because of what happened while your RV was sitting still. The potential threats are many, including the following:

UV rays

The sun beating down on your RV can dry out essential parts like seals and gaskets. It will also quickly fade the appearance of your RV’s exterior, causing it to age prematurely.

Rain and snow

While your RV is designed to keep water out, you don’t want to force it to do that work any more often than is necessary. By covering the RV, you won’t put it under undue stress while parked, and you can let it work hard when you are traveling, and it needs to be out in the open.

Falling debris

If you live on a property with plenty of trees, you need to consider things like falling leaves and branches. Even if it’s only a pile of leaves that builds up on your RV’s roof, that pile could become a home for pests, and soon you’ll have an unwanted problem.

Temperature control

It should also be mentioned that covering your RV will help moderate the temperature inside of the rig while parked. During the summer, an uncovered RV can get extremely hot inside, and that heat can damage various parts and systems. So no matter how you look at it, covering your RV is a wise move.

Two Unique Options

Once you decide that you would like to cover your carport, the next step will be to determine how you will make that happen. Two standard options are buying a cover or creating a covered parking spot.

Buying a cover for your RV is cost-effective, but it doesn’t offer the same protection as covered parking. With a cover, you have to deal with the hassle of climbing up onto the RV to stretch it over the rig, and then you have to undo that whole procedure when the time comes to take your next trip. Also, this type of soft cover doesn’t provide any meaningful protection from something like a falling branch or even a hailstorm that could damage the top of the RV.

When covering your RV, everything you want regarding performance is delivered by building a large carport tall enough to park your rig under. With this approach, you pull the RV into place under the roof, lock the doors, and you are all set. Neither the sun nor the rain will be able to beat down on the top of the RV, and the roof will catch any falling branches before they can strike the RV itself. And, since no cover is stretched over the exterior, you can access the inside of the RV at any time to start packing up, retrieve items you forgot, or do maintenance work.

American Carports Has You Covered

So, is it a good idea to cover your RV? We hope this blog helped answer that question! As you can see, protecting your RV from what Mother Nature has in store is a great way to maintain its condition and extend its useful life. While buying a fabric cover that can be stretched over the RV is one option that will provide some benefits, nothing works as well as putting a roof over the RV. If you need help with this exciting project, turn to American Carports! Our structures are easy to customize using our Build & Price tool, meaning you can create one that is the ideal size and shape for your RV and your property.

The Best Push Mower Storage Ideas for 2023

A push mower sitting outside: vulnerable to the elements, it seeks a safe home in a metal structure.

For the average homeowner, a mower is one of the trickiest things to store effectively. There are a couple of different problems that you’ll encounter when looking for a storage spot for this tool – the shape and the mess. A mower is quite long from front to back when you consider the length of the handle, and when you have finished mowing the yard, the blade and housing will be covered in a mat of grass. With all of that said, parking your mower outside isn’t a great solution, either. It’s a little bit unsightly, and the condition of the mower may quickly degrade when left out in the elements.

This article explores some of the best push mower storage ideas for 2023 to make your life a bit easier. And remember, if that solution involves a new metal structure on your property, American Carports, Inc. is the easy choice for such a project. Explore our Build & Price tool to customize your new shed or detached garage. If you have any questions, our team is always happy to help!

#1 Build a Shed

Without a doubt, the best place to store a push mower is in a shed in your yard. The advantages to this approach are many, including the following:

Convenient access

The yard is where you use your mower, so it only makes sense that you would want to store it in the same place. Then, when you are ready to mow the lawn, you can simply open the shed, pull out the mower, and get to work. When the job is finished, you tuck it away and close the door. This simplicity will make the whole chore of mowing the lawn feel far less of a hassle than it might be currently.

Space for other things

Your mower will only be one of many landscaping tools and supplies you can keep in this shed. Once you have it all set up, your shed will be a one-stop shop for everything you need to take care of your yard and have it look great all year round.

Contain the mess

Most of the tools you use to care for your property, including the mower, will be rather messy after you use them. Sure, you’ll want to clean them off before putting them away, but you don’t want to go through a full cleaning ritual every time. By having a shed that is dedicated to the storage of landscaping equipment, you can allow it to get a bit dirty without a worry.

If you add a shed to your property, look for a convenient spot that is also off to the side and out of the way. Depending on the shape and size of your lot, the side of the house tends to work well. That way, you won’t have to look right at the shed when you step out the back door, but it will be close at hand and ready to use when needed.

#2 Park It in the Garage

If a shed is not a suitable option, consider parking your lawnmower in the garage while it is not in use. For most people, the garage is a space that serves many different purposes, including the storage of various types of items. By keeping a spot on the side of the garage open for mower parking, you can roll up the door and push it in when the yard work is done for the day.

One problem you might experience with this plan is the smell that a lawnmower can produce. Unless you get all of the grass off the mower after each use, some grass will dry on the mower – and drying grass tends to smell pretty bad. So, if you like to use your garage for other things and don’t want it to stink, carefully cleaning the mower deck will be required.

#3 Buy a Cover

Finally, you could leave your mower outside with a fabric cover to keep the rain away. While a cover is the least effective option discussed in this article, it’s still better than nothing. On the plus side, these covers are affordable, so you won’t have to spend much money to add at least a little protection to your mower as it sits near the house, waiting for the next mowing day to arrive.

American Carports Has You Covered

We hope you enjoyed this blog on the best push mower storage ideas for 2023! Don’t let another summer go by with push mower storage being a source of frustration on your property. Instead, turn to American Carports, Inc. to add a quality, durable metal shed that can act as a comfortable home for your mower and many other landscaping tools.

Explore our Build & Price tool to get started today. Thank you for stopping by our blog; we hope to help you soon!

How to Store Golf Clubs in Your Garage

A bag of golf clubs laying on a golf course

For millions of folks nationwide, golf is a way of life. But, as you may already know, golfing is one of those hobbies that tends to become an obsession, with many golfers spending every spare minute trying to find new ways to enjoy the game they love.

Of course, a golfer is nothing without a set of clubs, and those clubs need a place to live between rounds. Usually, that home is the garage, which is generally a suitable environment for golf club storage. However, there are some potential issues with storing your clubs here, so we’ll offer advice in this article to help you sidestep any problems you might otherwise encounter!

Do you need to build a new garage on your property for golf club storage? If so, remember to turn to American Carports, Inc. Get started by exploring our free Build & Price tool. If you have questions along the way, contact us, and a member of our team will reply shortly.

Keep Them in the Bag

As a starting point, it’s a good idea to keep your clubs in their bag throughout the storage period. These bags are designed to hold clubs and to keep them safe, so there is no reason to take them out. By finding a good spot to store the whole bag with the clubs in it, you’ll have your golf equipment contained and ready to use at the next opportunity.

That said, you should sort through the bag before long-term storage to ensure nothing that could cause problems is left behind. For example, it’s easy enough to forget that half-eaten Snickers bar you shoved into the side pocket during your last round. But the critters in your garage certainly won’t forget about it! So always remember to do a quick bag cleanout, and you can avoid running into problems later on.

Get Them Off of the Ground

If possible, it’s best to store your clubs off the ground where they will be out of danger. Leaving them on the floor in the garage means they could easily get knocked over by people walking by or even hit by the car when you bring it inside to park. There are plenty of golf bag storage products on the market you can pick from for this purpose, or you might choose to build a bag holder if you are so inclined. A suitable bag holder will even include room for your golf shoes and some other accessories so that everything can stay together in a single place.

Manage the Temperature

You don’t have to worry too much about the conditions in your garage as far as your clubs on concerned, but exceptionally high temperatures could cause some issues. Specifically, the glued connection between the club shaft and the head could get loose in a hot garage, leading to the club head twisting or even flying off when you use the clubs again. Storing the clubs in an insulated garage – like one you could create with the help of American Carports, Inc. – will help to prevent the dramatic temperature swings that can cause issues.

Clean the Clubs Thoroughly

If you live in a climate where golf is a seasonal activity, the day will eventually come when you have to put your clubs into the garage for the winter. Before you put them up for the year, take the time to thoroughly clean and dry your equipment. Golf clubs usually come back from the course with plenty of dirt and grass in tow, and leaving all of that on the clubs through the winter may cause rust and other issues to develop. It only takes 15 or 20 minutes to clean your clubs properly, and doing so will ensure they are still in good condition when spring rolls around.

American Carports Has You Covered

We hope this article helped you discover how to store golf clubs in your garage! And remember, reach out to American Carports, Inc. when you are ready to work on a new metal garage project. It all starts with our free Build & Price tool. Thanks for stopping by our blog; we hope to serve you soon!

Can You Store Clothes in a Shed?

Clothes hanging on a line to dry before going into storage.

Having a shed on your property is a great way to add convenient storage space that may be just steps from your home. This is far more appealing than renting a storage unit somewhere around town, which would require you to get in the car every time you wanted something – not to mention the ongoing monthly expense of the rental.

While you might think first about using a shed to store things like a lawnmower and other landscaping tools, the potential of this space is far greater. In fact, you might even be able to use your shed to store clothes, as long as you have the right plan for doing so successfully.

Step #1: Know Your Enemies

Properly storing your clothes in a shed comes down to knowing what threats those clothes will face while in storage. If you understand the risks, you can pick a storage method to keep trouble at bay and ensure your clothes remain in good condition until you are ready to use them again. With that in mind, let’s look at the three primary threats you’ll need to mitigate when storing your clothes in a shed.

Moisture

You don’t want your clothes to get wet while in storage. They should be completely dry when you put them into storage, and you should pack them up to ensure they stay dry day after day. If the garments get wet, you will likely face mold problems, which would ruin the affected clothes, and you’d have no choice but to throw them out. Any adequate clothes storage strategy is going to prioritize keeping moisture away. Wait until clothes have cooled after using a dryer because sometimes, the heat can make us mistake clothes for being dry when they aren’t!

Critters

If you have a shed in your yard, a few little critters will likely come poking around occasionally. And, if those critters make their way into the shed, they’ll probably look for food or a place to hide out and be comfortable. Your clothing would make a cozy bed, so it is an ideal target for any critters who make it inside. Good clothes storage adds a layer of defense between your clothes and the critters so that no damage occurs, and you won’t be in for an unwelcome surprise later on.

Direct sunlight

Direct sunlight can also threaten clothes for sheds with a window or sheds where the front door is open frequently. The sun’s power can degrade the condition of your garments and cause them to fade from their true color.

How to Store Clothes in a Shed

So, knowing the three threats above, what is the right solution for clothes storage in a shed? Black plastic storage totes are the way to go. With a firmly-attached lid, these totes will address all the issues we’ve highlighted. A good tote is going to lock out any moisture that is in the air, it will keep critters from getting in, and the black color will block the sun’s rays and prevent UV damage. As a bonus, these totes are easy to stack, and you should be able to pack many clothing items in a relatively small shed.

Other Storage Possibilities

Unless you have a lot of clothes to store, there will probably be room left in your shed for some other things. If you want to move different items from your house out into the shed for storage, keep these tips in mind.

Furniture

Many of the same risks for clothes apply to furniture, so protect it with plastic before putting it into the shed. Of course, you won’t be able to fit furniture into a bin, but you can use large rolls of stretch wrap to cover each item and limit the risk of damage.

Mattresses

You’ll need a rather large shed to store a mattress, but if you have that kind of space available, look into the possibility of getting a mattress storage bag to keep it in good condition. One thing you’ll want to avoid is stacking up anything else on top of the mattress – that kind of ongoing pressure on the bed will leave it far less supportive when you are ready to use it again.

Mirrors

As one of the trickiest items to store safely, you must pack mirrors carefully to avoid breaking them in the shed. As a starting point, run some tape across the mirror diagonally, and then wrap the whole thing in bubble wrap to limit the chances of breakage. Finally, use cardboard over the bubble wrap to cover the corners and place the mirror in a spot that is unlikely to be disturbed.

American Carports Has You Covered

While most of your clothes are sure to continue living in your closet, having an extra space like a shed for seasonal items or things you don’t wear very often is a nice bonus. Work with American Carports, Inc. today to create a versatile shed solution for all your storage needs.

At American Carports, Inc., we offer fully-customizable, affordable sheds built to withstand the test of time. Get started with our Build & Price tool, and don’t hesitate to get in touch if you need assistance. We hope to work with you soon!

How to Keep Paint from Freezing in the Garage

Open cans of paint in a garage

Painting is one of the best DIY projects for a homeowner to tackle. Even if you don’t consider yourself to be very handy, you can dramatically upgrade the look and feel of parts of your home simply by applying a fresh coat of paint. But, of course, when the painting is complete, there will likely be some leftovers – and storing those cans in the garage is the obvious solution.

Most of the time, storing paint cans in your garage will work nicely. However, when freezing temperatures move in, you might face some problems. Specifically, ice can develop within the paint, likely ruining it. Therefore, to ensure you can use your stored paint on future projects, you must find a way to prevent it from freezing. That’s the issue we are going to tackle in this article.

Grab a Blanket or Towel

If you already have some paint cans in your garage and cold weather is coming, you might need a quick solution. First, consider wrapping some old blankets or towels around the paint cans before the temperatures drop too low. With this method, you’ll provide a layer of insulation to the paint, which might be enough to keep it from slipping too far under the freezing mark.

Remember that your garage floor may be frigid when using this method, so protect the paint cans from below, too. The solution is simple: Move cans up to a shelf where they can be wrapped in a blanket, or put a blanket on the ground under the cans and then wrap them up. This technique probably won’t get the job done throughout a long winter, but this may do the trick if you have a cold snap coming and want to save your paint.

Insulate the Garage

The idea above involved insulating individual paint cans or a group of cans. With that in mind, why not go a step further and insulate the entire garage? That will be a more convenient, effective solution and help more than just the paint cans when cold weather arrives. Fortunately, American Carports, Inc. makes adding insulation to your metal garage easy when you order from us, so be sure to request this helpful feature.

Insulation in your garage will help neutralize the temperature swings throughout the year, from winter to summer. As a result, the space will be friendlier to the things you have stored inside, and it will be more comfortable when you want to spend time there. Given the modest additional cost of having insulation included with your detached garage and the significant impact it can have once in place, this decision is an easy one.

Look Into Additives

Even with insulation in place, you might find that the temperatures in your garage still get down near the freezing mark when the weather is below freezing. If you live in such a climate, look into freeze-thaw-stabilizing products to add to your paint. This is a chemical that you can add to the paint cans per the manufacturer’s instructions, and it will help keep the paint in good condition even in the cold. Then, when the time comes to use the paint again, you should be able to stir it up thoroughly and have it work correctly for you. Of course, you’ll want to wait until the temperatures rise above freezing to use your paint, as applying paint in such cold weather would be a recipe for disaster.

American Carports Has You Covered

Taking some simple steps will allow you to prevent paint from freezing in your garage, but it all starts with having the right garage in place for your needs. For that, there is no better partner than American Carports, Inc. With endless customization options, you’ll find it easy to create the perfect structure for your property. Thank you for visiting, and we hope to work with you soon!

Start Building

Can You Leave a TV in a Cold Garage?

A TV (television) inside of a cold garage.

On the average residential property, the garage is the obvious storage solution for almost everything. Whatever it is, if the house doesn’t have room for it, the garage is the most likely destination. That works great for many items, but it’s important to remember that a garage is typically not a climate-controlled space. Without heating or cooling, some of your possessions could be damaged if they stay in the garage throughout the year. So, can you leave a TV in a cold garage? We’ll take a closer look in the article below.

A Simple Answer

To get right to the point, storing your TV in a cold garage or any other cold space is typically okay. Generally speaking, cold temperatures aren’t going to do anything to harm electronics. Of course, that story might change if the temperatures were well below freezing – but that’s not going to be the case in the average garage.

It should be noted that hot conditions are a different story. Very high temperatures can harm electronic components or cause connections to fail if the temperatures are high for an extended period. So you might need to think twice about storing your TV in a garage in a scorching climate, but cold shouldn’t present any issues at all.

Preparing Your TV for Storage

While the cold temperatures aren’t much of a threat, there are still problems that can come up with garage TV storage. To get good results, keep the following tips in mind.

Wrap it carefully

Typically, garages are somewhat messy, hectic spaces. If a lot happens in your garage daily, ensure the TV is protected from accidental damage. Wrap it up with bubble wrap, or at least some stretchy plastic, and put it in a place where it is unlikely to be damaged.

Unplug the cords

If you leave cords attached to the TV, you’ll only increase the likelihood of the TV being damaged along the way. For example, one of the cords could get pulled and either damage the connection or pull the TV down from where it is stored. So, before you put it away, take out the power cord and any HDMI cords, and roll them up for separate storage. Along these same lines, if a wall mount is attached to the back of the TV, you might want to take it off before you store it.

Make sure it’s balanced

The slim profile of modern TVs makes them tricky to store, as there is no substantial base to rest the TV on (in many cases). Depending on the size of the TV, you might be able to put it in a cardboard box to help it stay upright. If that isn’t an option, think about attaching something to the garage wall to restrain the TV while it is in storage.

The Humidity Factor

One thing you do need to worry about when storing electronics in your garage is humidity. If the air in your part of the country is particularly damp during the summer months, moisture could accumulate in your garage and damage some of your things. For example, if your TV is left out in the open inside the garage, it could develop condensation, and that water would pose a severe risk to the health of the TV.

A good starting point is taking some of the abovementioned steps, like wrapping the TV up or putting it in a box. To go a step further, you might think about using a dehumidifier in your garage to decrease the moisture level during the humid times of the year. This would not only go a long way toward protecting the condition of your TV but also of anything else that you store in the garage. High humidity can wreak havoc on many things, so using a dehumidifier is an affordable way to protect your possessions.

American Carports Has You Covered

So, can you leave a TV in a cold garage? We hope this blog helped answer your question! Remember, storing your TV in the garage should be perfectly fine unless you live in a climate where extremely low temperatures are the norm. But, of course, you can only use that option if you have a garage space available for storage, so turn to American Carports, Inc. if you need help with that project.

Explore our free Build & Price tool to get started. Or, reach out to a member of our team if you have any questions. Again, thanks for stopping by our blog; we hope to serve you soon!

How to Keep Mice Out of Your Garage

Cute brown mouse outside that you probably don't want living in your garage.

There are many great possible uses for a garage space. Whether you plan to use your garage for storage, projects, parking, or a combination, the options are endless. But, of course, none of those options will work out well if you are dealing with little critters that have made their way into the space. So, if you suspect mice have entered your garage or want to ensure that doesn’t happen in the future, this article will be helpful. Read on for your guide on how to keep mice out of your garage. First, we’ll look at why mice become a problem in the first place and what you can do about it.

If you’re looking to add a new metal garage to your property for an affordable price, contact American Carports, Inc. today. Thanks to our Build & Price tool, you can customize your building and see how much it will cost as you go. Also, you are always welcome to contact us to get help from our team.

Why Do Mice Come Inside?

Perhaps the best way to deal with your mice problem is to first think about why they would want to come into your garage in the first place. After all, if you can make the space less attractive to mice and other critters, they’ll be more likely to keep looking for another area to explore. There are many potential draws to a garage, but the points below highlight the leading reasons why mice like to explore this area.

There is food available

Food is the driving motivator behind the things that most animals do, so you always want to start here. If there is a convenient food source in your garage for the mice to enjoy, they will return repeatedly. Remember, even things that aren’t food for humans can make for an excellent meal for a mouse, so review the contents of your garage and consider all possible “snacks.” If you plan to keep food items in the garage, ensure they are sealed up tightly and not available to critters.

It’s warm

Even if your HVAC system doesn’t warm your garage, it’s likely warmer than the outdoors – especially in the winter. So when the weather gets particularly cold, don’t be surprised if mice try to find a way in to escape those conditions.

Nesting

Mice like to find cozy little places to establish a home, and there are many dark spots in a crowded garage that are just waiting to be explored and used as a resting place.

A Telltale Sign

Besides seeing a mouse, the classic sign that at least one mouse has been frequenting your garage is droppings. Wherever mice go, they will leave at least some poop behind, so don’t look the other way when you see this evidence. If you see droppings in your garage, it’s probably not going to be a one-time event, so you’ll want to quickly come up with a plan to address this issue and keep the mice out moving forward.

Mice-Prevention Measures

Once you know mice are around, you’ll want to work on possible solutions. Of course, we already discussed putting food items away, but that’s a starting point. Here are some of the other ways you can approach this matter.

Seal up the cracks

Sealing cracks is perhaps the most obvious and important step to take. When mice get into your garage, they have an available path to sneak in, even when the door is closed. One good technique to spot openings is to close the door during the day and see if any light is sneaking in. Mice need very little space to squeeze through an opening, so fill up even the most minor gaps to prevent the mice from breaking in.

Reduce clutter

If your garage door is open a lot during the day and evening, you can’t rely on sealing up the space alone to keep mice away. So, you’ll also want to make the garage less appealing by cleaning up the floor and giving mice fewer places to hide and be comfortable.

Eliminate outdoor habitat

This last point is a big one, often overlooked by homeowners. If you have mice coming into your garage, they live nearby. Often, they’ll find outdoor homes in garbage bags, piles of leaves or branches, etc. Keeping a clean property will make it more likely that they’ll find other areas to hang out.

American Carports Has You Covered

We hope you enjoyed this guide on how to keep mice out of your garage! Keeping mice and other critters out of your buildings is always tricky, but it can be accomplished with patience and by trying a few methods listed above.

We hope the ideas above are helpful, and we’d be happy to serve you soon if you are in the market for a new metal garage. Remember to explore our free Build & Price tool when you are ready to start your next project. Thanks for visiting our blog, and we hope to serve you soon!